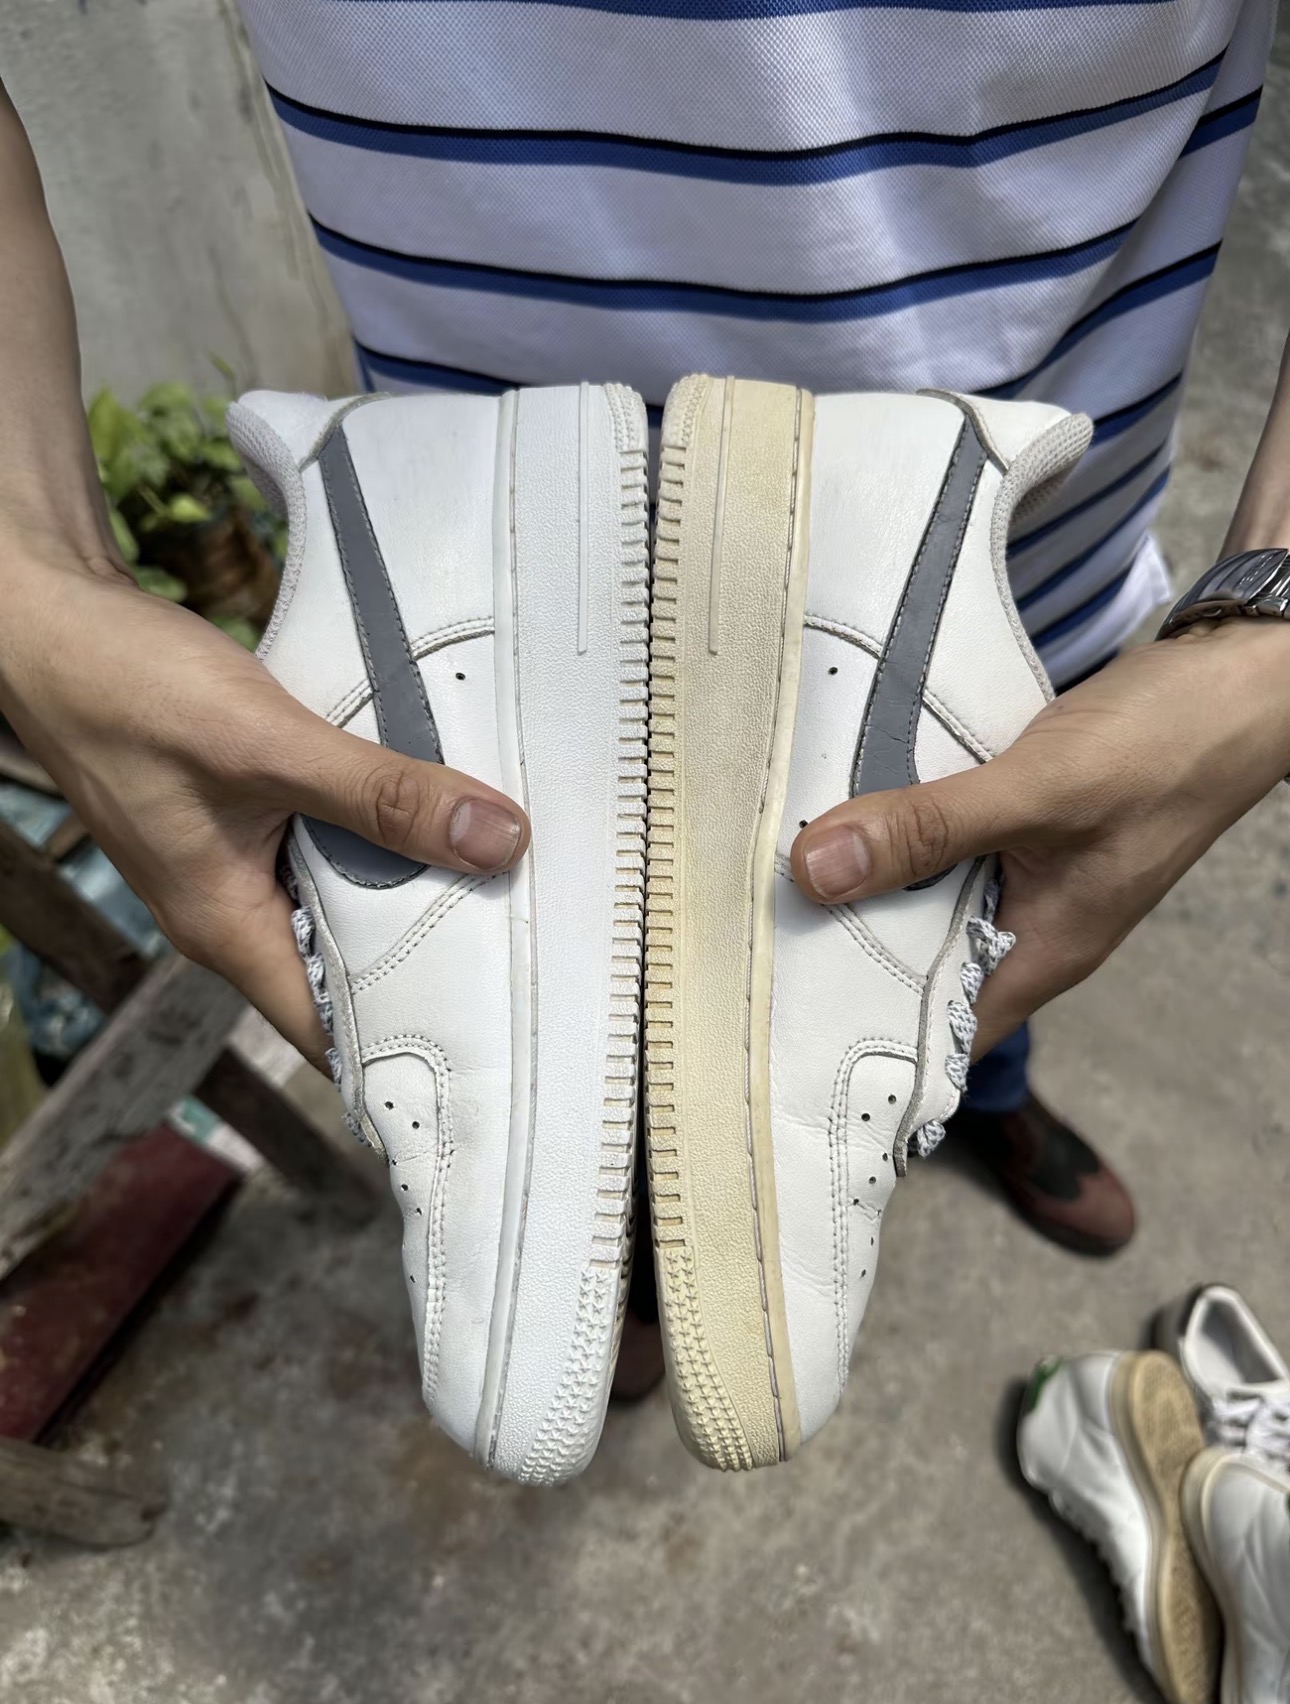
Sneaker soles yellow from rubber oxidation (UV rays + ozone + heat). The whitening process: clean the sole with alcohol → apply Gazano #7 unyellowing solution → sun-expose for 2-3h under cling film → rinse off. Do NOT use oxygen bleach or whiten too many times a month — the sole will turn brittle and crack.

Top 3 brands customers bring to Gazano: Louis Vuitton · Hermès · Gucci. Suede/nubuck sneakers make up most of the "sole whitening" category — and they require a completely different technique from smooth leather.
Why do soles turn yellow or stained?
Sneaker soles turning yellow is the natural oxidation of rubber — it happens with exposure to UV light, high temperatures, and air. This chemical reaction can't be fully prevented, only slowed down.
White soles yellow the most because the whitening agent (titanium dioxide) breaks down over time. Translucent (icy) soles are even more UV-sensitive and often yellow within 1–2 years.
Not every sole type can be whitened. PU (polyurethane) soles yellow because the material itself is degrading — they can't be whitened and you shouldn't try. Only rubber and simple EVA soles can be treated.
How to identify your sole type
Rubber soles — Can be whitened
Hard, dense, no foam. Doesn't dent under firm pressure. Typical of Nike Air Force 1, Converse, and soccer cleats. Whitens effectively.
EVA soles — Partially whitenable
Lightweight, slightly foamy when pressed. Common in the midsoles of many sneakers. Can be whitened, but with weaker results than rubber.
PU (Polyurethane) soles — Do NOT whiten
The surface has many tiny pores and flakes off as it ages. Yellows from material breakdown — not surface oxidation. Whitening chemicals will only accelerate the degradation.
The correct sole-whitening process
Sole whitening solution is a strong oxidizer. Keep it away from leather/suede uppers — it will damage the color and finish. Wear gloves while working.
Clean the sole first
Use a stiff brush and soap to remove dirt and grit stuck to the sole. Let it dry completely before whitening — never treat a damp sole.
Mask the upper carefully
Use masking tape or plastic wrap to fully cover the upper, especially where the midsole meets the outsole. This step matters — skipping it can ruin the shoe.
Apply the whitening solution
Spread the solution evenly over the entire area to be whitened using a brush or lint-free cloth. The thickness of the layer affects the results — apply evenly and generously.
Wrap in film and activate with UV
Wrap tightly in cling wrap to keep the solution from evaporating. Place under a UV lamp or in direct sunlight for 30–90 minutes, depending on how yellowed the sole is.
Rinse clean and let dry
Remove the wrap and rinse the sole thoroughly with clean water and soap. Don't leave the chemical sitting on the sole long after the UV exposure ends — it can make the sole more brittle.
Common mistakes to avoid
- Using chlorine bleach (laundry bleach) — yellows the sole further and makes the rubber brittle faster
- Letting it touch suede uppers — the whitening chemical destroys the suede surface beyond repair
- Whitening PU soles — accelerates the material's breakdown
- Not rinsing thoroughly afterward — chemical residue keeps oxidizing and embrittles the rubber
- Sun-exposing too long — excess UV also yellows the sole further after a few hours